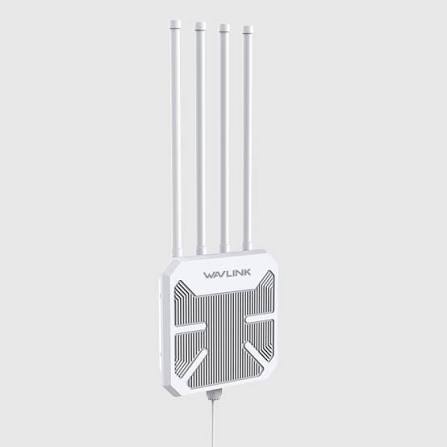
Wavlink Routers Wavlink Aerial HD6 AX1800 Settings
Official page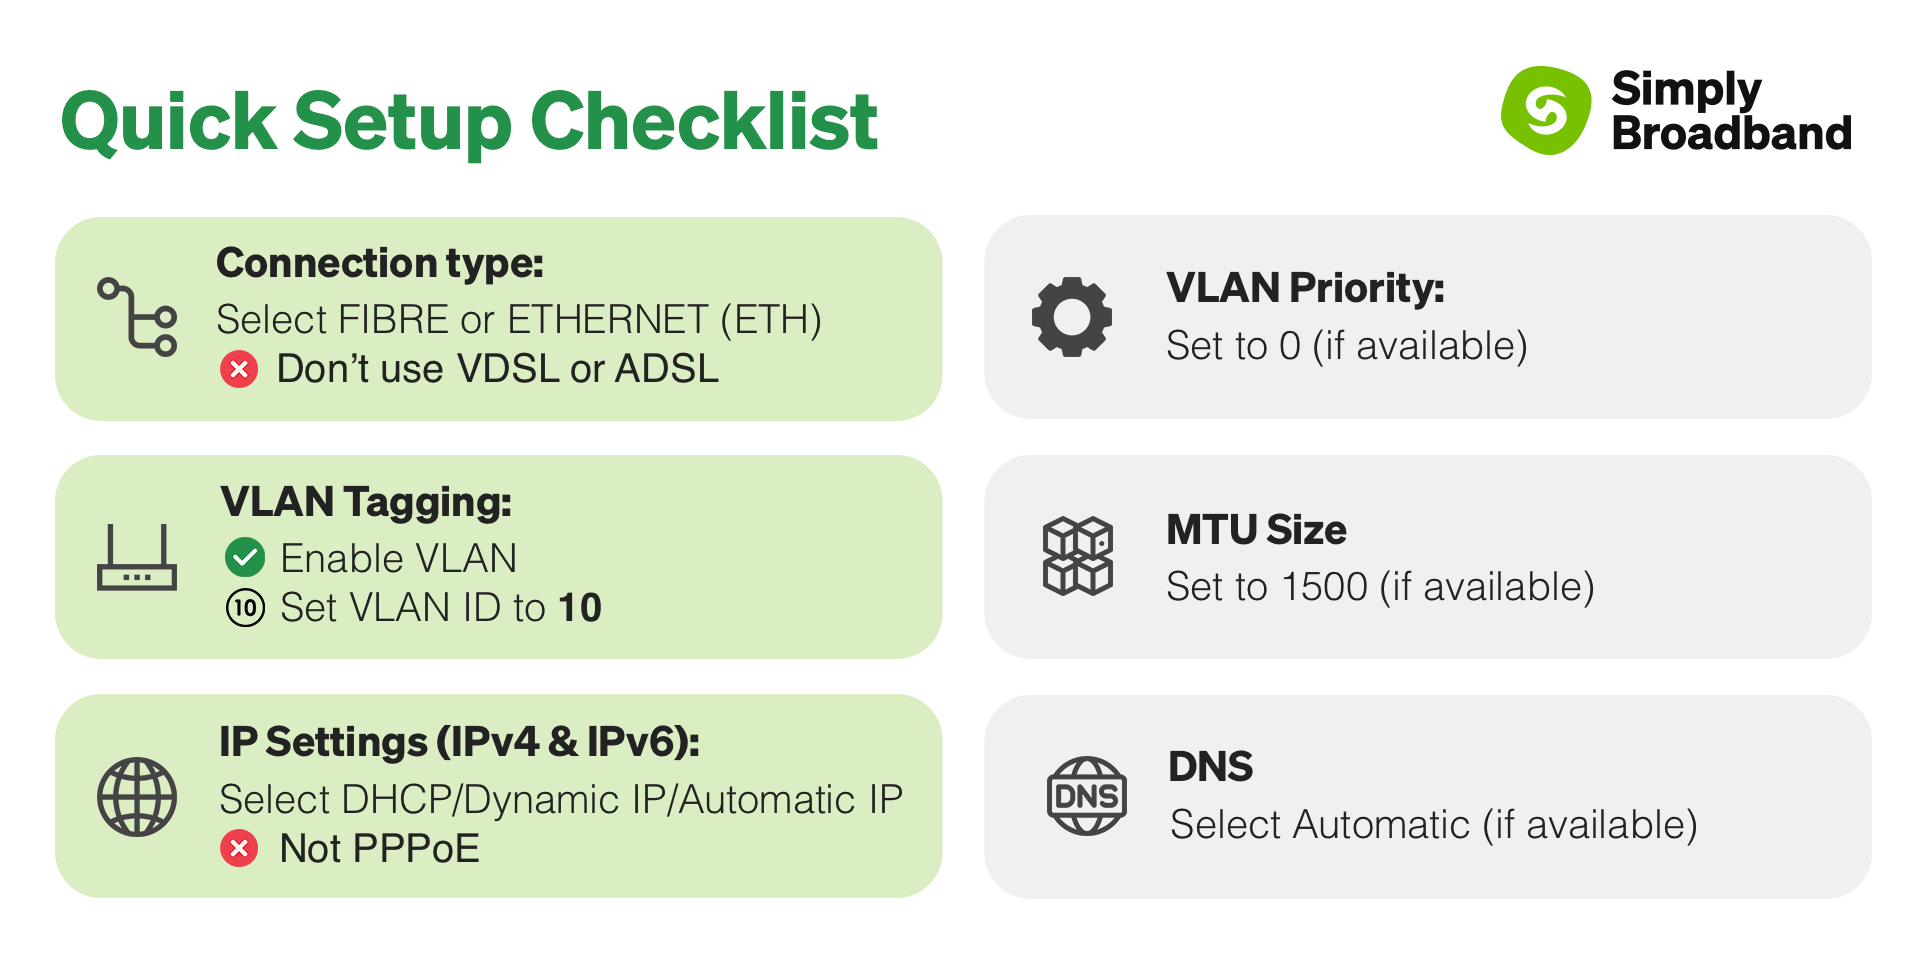
Step-by-step guide to set up Wavlink Aerial HD6 AX1800
Physical connection:
- Connect the WAN port of the Wavlink AX1800 router to the first port (LAN1 or GE1) on your Optical Network Terminal (ONT) using an ethernet cable.
- Sometimes we connect to second port instead of first - check your Welcome email instructions to make sure which port you should use.
- Ensure the router is powered on and that your computer or smartphone is connected to the router via Wi-Fi or a LAN cable.
- Open a web browser on a connected device and enter
192.168.10.1 (or try: 192.168.30.1 or http://wifi.wavlink.com)into the address bar. - Log in using the default credentials:
- Username: admin
- Password: admin (or check the router label for default credentials)
- If you have changed the default credentials and cannot remember them, proceed to Step 8 for resetting the router.
Once logged in, follow these steps to set up the Internet connection type:
-
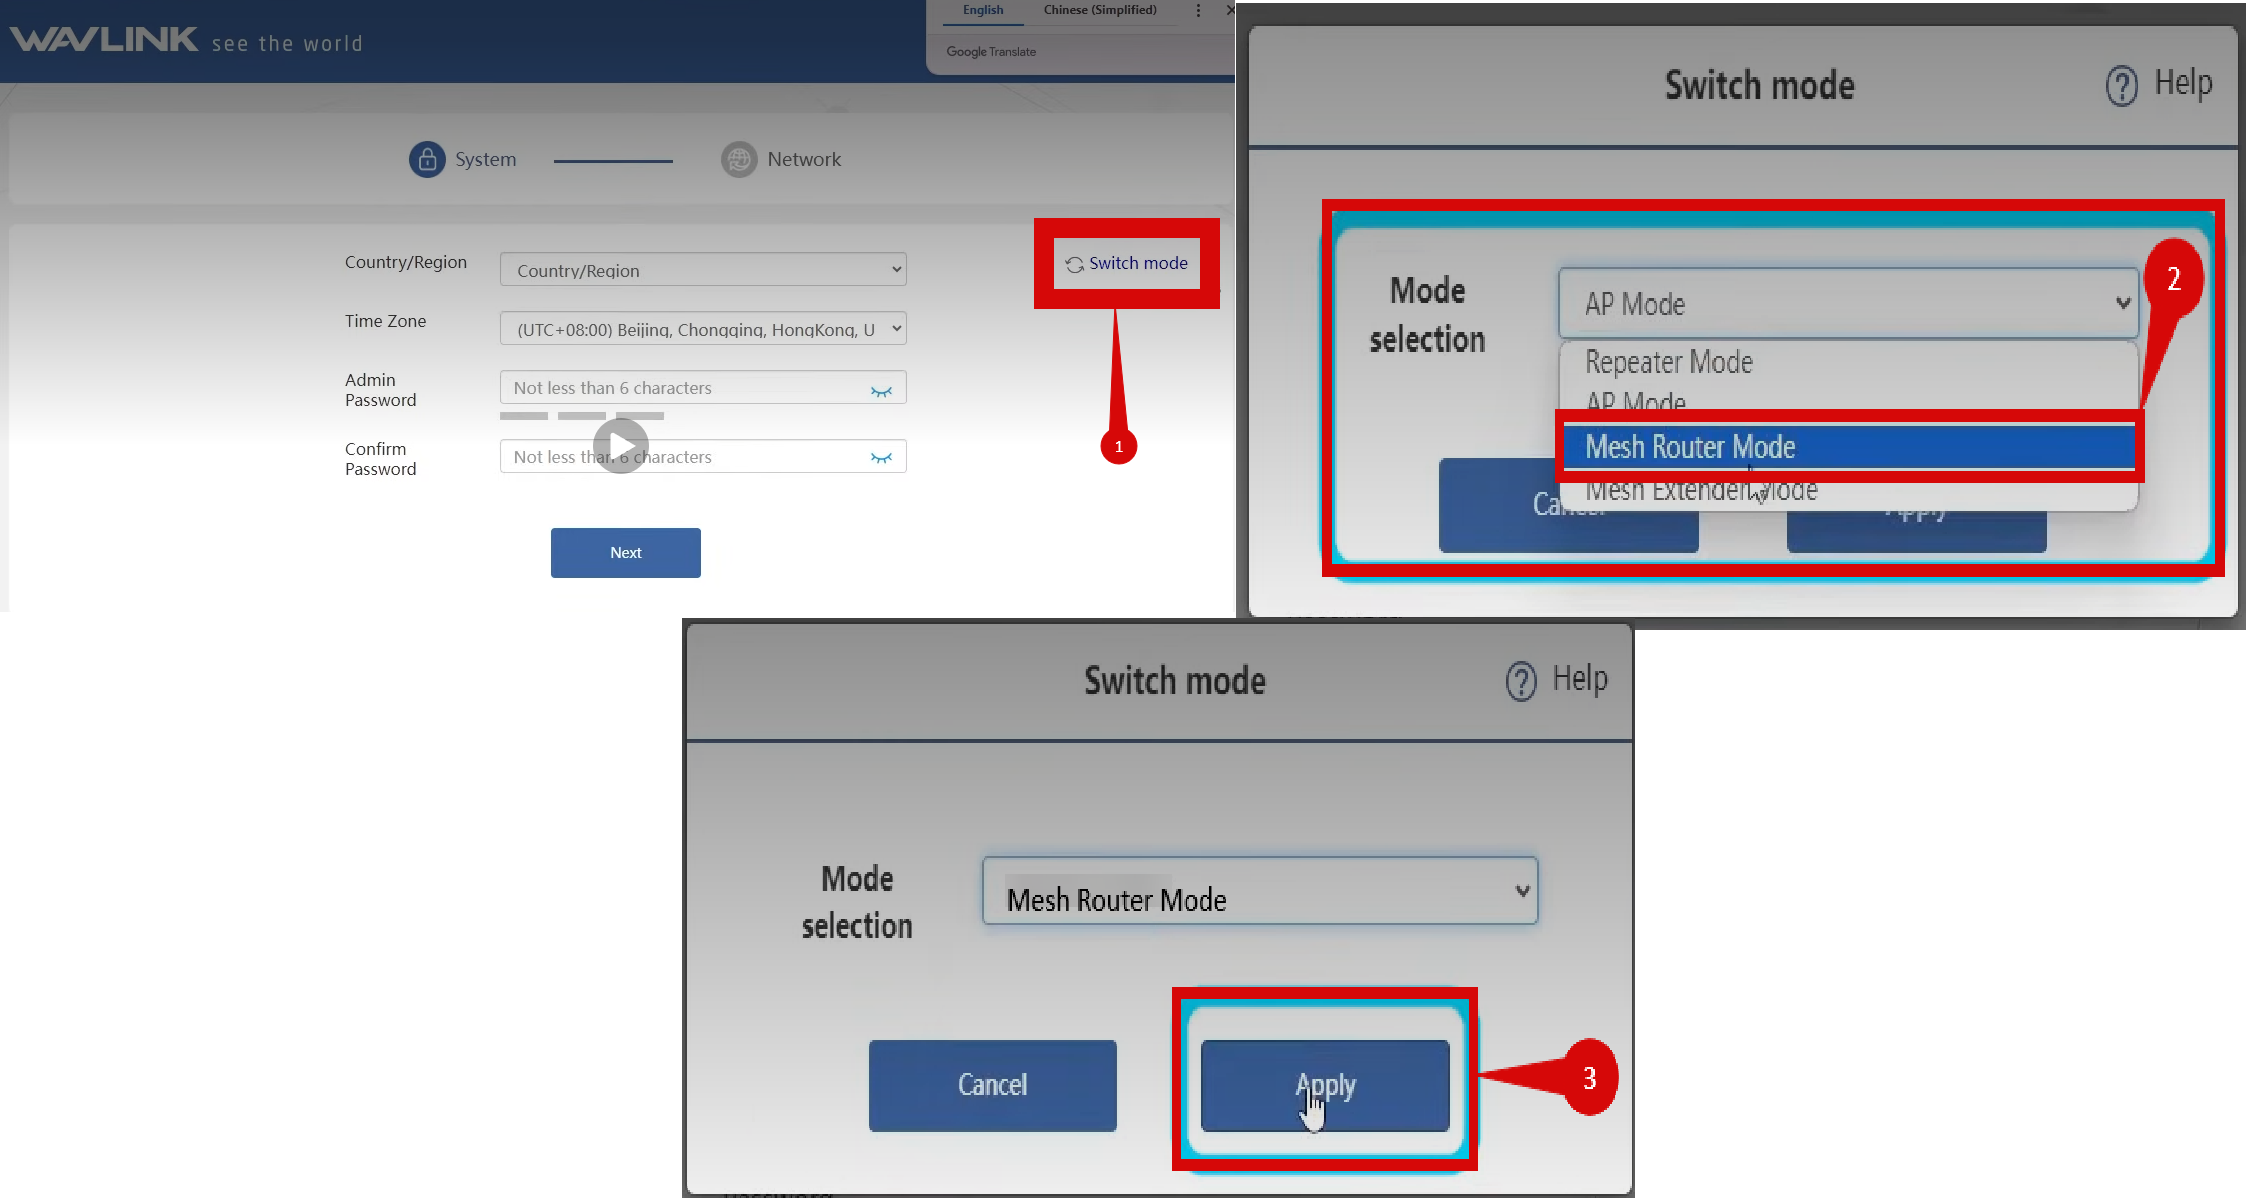
Click Switch Modes (step 1).
- Select Mesh Router Mode (step 2).
- Click Apply (step 3).
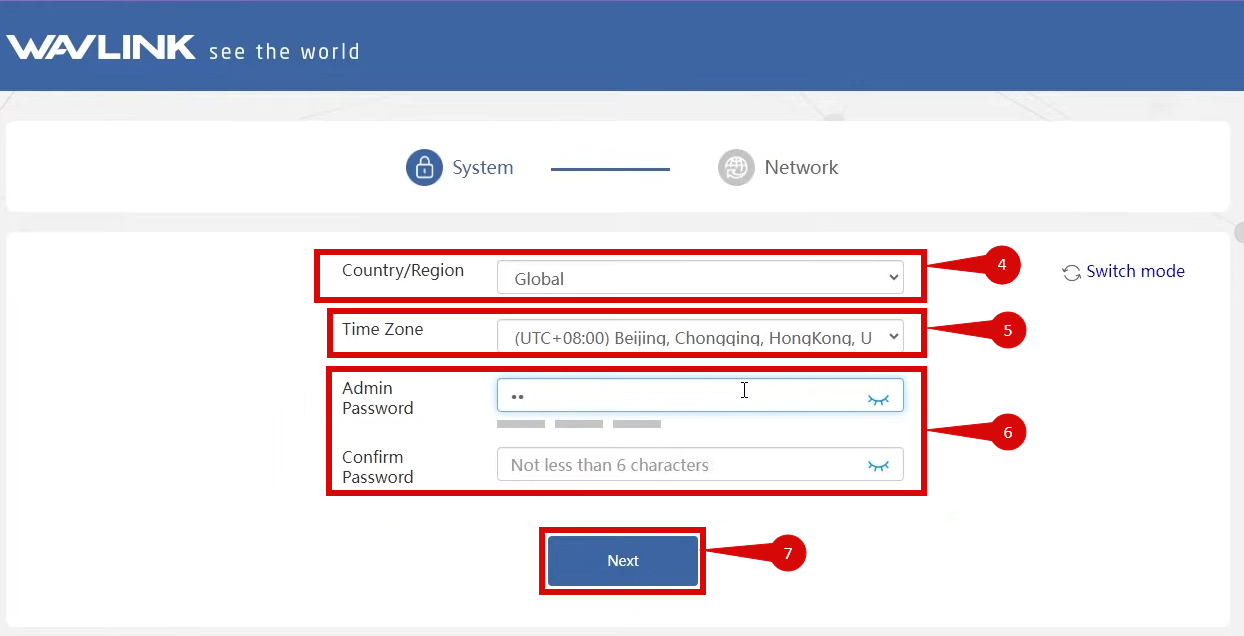
- Set Country/Region to Global (step 5).
- Set Time Zone to New Zealand (step 6).
- Create a new Admin Password (step 7).
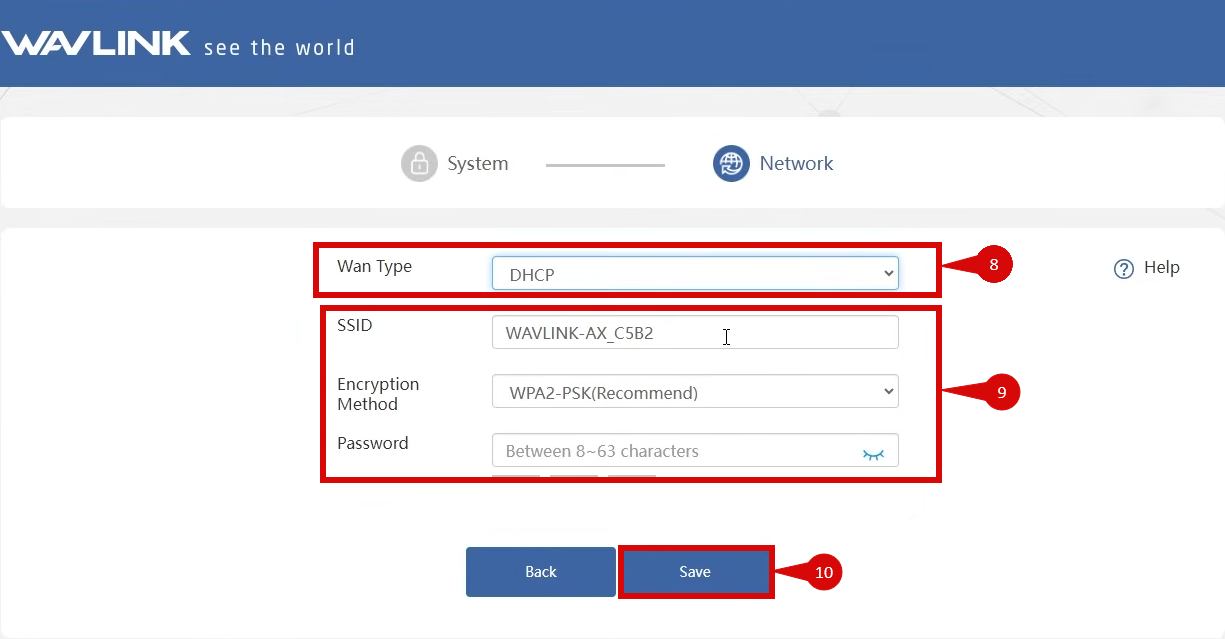
- Set WAN Type to DHCP (Dynamic IP) (step 8).
- You can also change your Wi-Fi settings on this page (step 9).
- Click Save (step 10).
Once the device has applied the Wi-Fi settings, you will need to reconnect to the Wi-Fi. Once reconnected, refresh the page and you should be redirected back to the management page.
You may have to configure the VLAN settings manually. If this is the case, follow the instructions below:
- Navigate to More > Network > IPTV/VLAN.
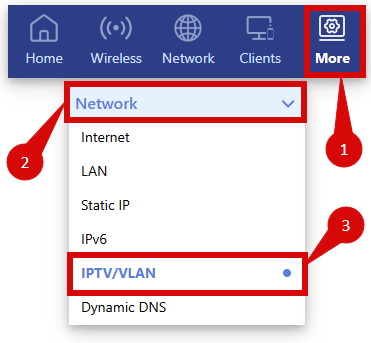
- Enable IPTV.
- Set IPTV Mode to VLAN Bridge Mode.
-
Configure the following settings:
- Internet VLAN ID:
10
- Internet VLAN ID:
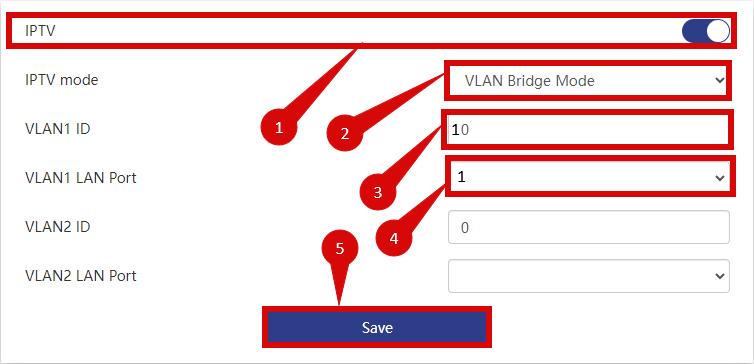
- Click Save to confirm the changes.
- Once logged in, follow these steps to set up the Internet connection type:
- Navigate to More > Network > Internet.
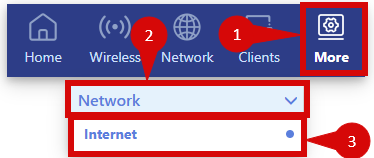
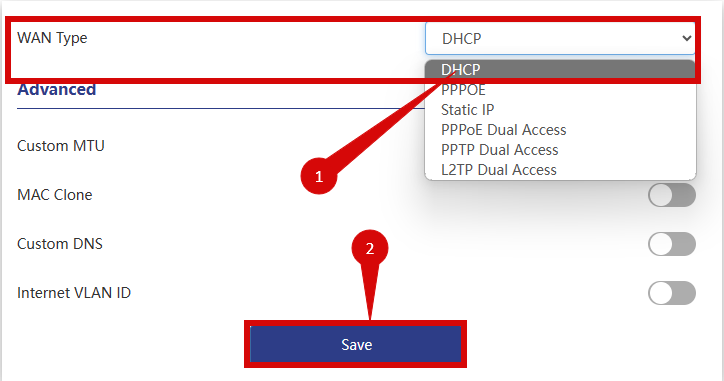
- Set the WAN Type to Dynamic IP (DHCP).
- Click Save to save the settings.
To set up VLAN:
- Navigate to More > Network > IPTV/ VLAN.
- Enable IPTV.
- Set IPTV mode to VLAN Bridge Mode.
- Configure the following settings:
- Internet VLAN ID:
10
- Internet VLAN ID:
- Click Save to confirm the changes.
- After entering the VLAN and DHCP settings, click Apply to save the configuration.
- The router may restart to apply the new settings. Wait a few minutes for the restart to complete.
- Once the router has restarted, check the status of your internet connection by looking at the WAN/Internet LED indicator on the router. It should be solid green.
- On your connected device, try accessing a website to confirm that your connection is active.
If your internet connection is not working:
- Restart both the ONT and the router by unplugging them for 30 seconds and plugging them back in.
- Double-check the VLAN and DHCP settings in the router’s configuration.
- Ensure that the ethernet cable is securely connected to the correct ports (first port on the ONT and the WAN port on the router).
If you cannot access the router due to forgotten login credentials or misconfiguration, reset the router to factory settings:
- Find the reset button at the back of the router.
- Press and hold the reset button for about 10-15 seconds using a pin or paperclip.
- Release the button once the router’s lights start flashing. The router will reboot and return to factory settings.
- Log in using the default credentials (admin/admin) and repeat the configuration process from Step 2.
If you are still unable to connect, please reach out to our support team at our Support Portal - https://help.simplybroadband.co.nz for further assistance.