← Back to Ubiquiti Modem / Router UFB Settings
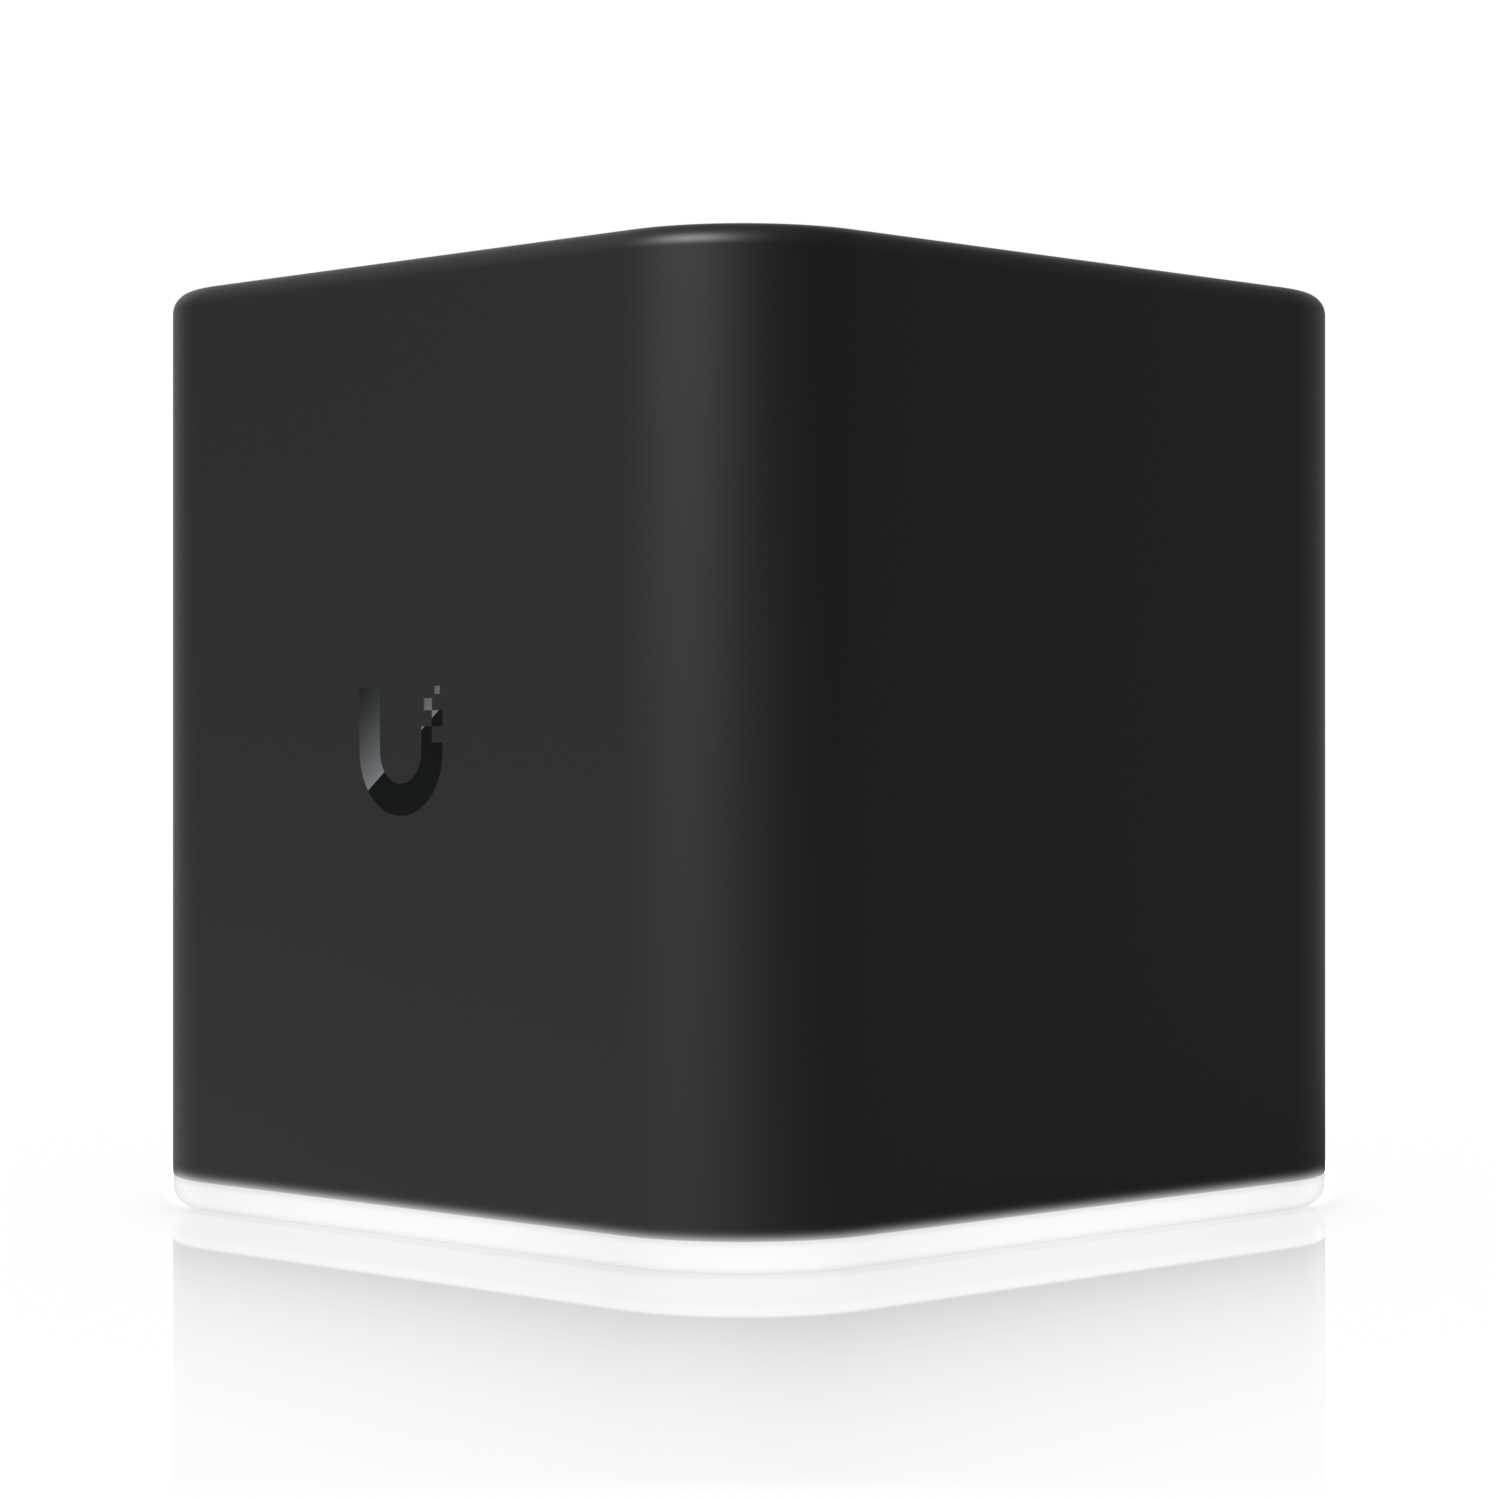
Important considerations for this router
- This device can use an app for initial setup.
- https://play.google.com/store/... - Android download
- https://apps.apple.com/us/app/... - iOS download
- The app is a good way to configure, but the web UI offers more options.
- If you cannot access the admin panel use the UISP app to get the initial setup done.
Step-by-step guide to setup Ubiquiti airCube AC router
1. Connect your router to the ONT
- Physical connection:
- Connect the WAN port of the Ubiquiti airCube AC router router to the first port (LAN1 or GE1) on your Optical Network Terminal (ONT) using an ethernet cable.
- Sometimes we connect to second port instead of first - check your Welcome email instructions to make sure which port you should use.
- Ensure the router is powered on and that your computer or smartphone is connected to the router via Wi-Fi or a LAN cable.
2. Access the router’s Admin Panel
- Open a web browser on a connected device and enter 192.168.1.1 (or what is on the information tag) into the address bar.
- You will be prompted to log in, use the default credentials on your router. Default credentials might be:
- Username: ubnt
- Password: ubnt (might not be this).
- If you have changed the default credentials and cannot remember them, proceed to Step 8 for resetting the router.
3. Configure your internet connection settings
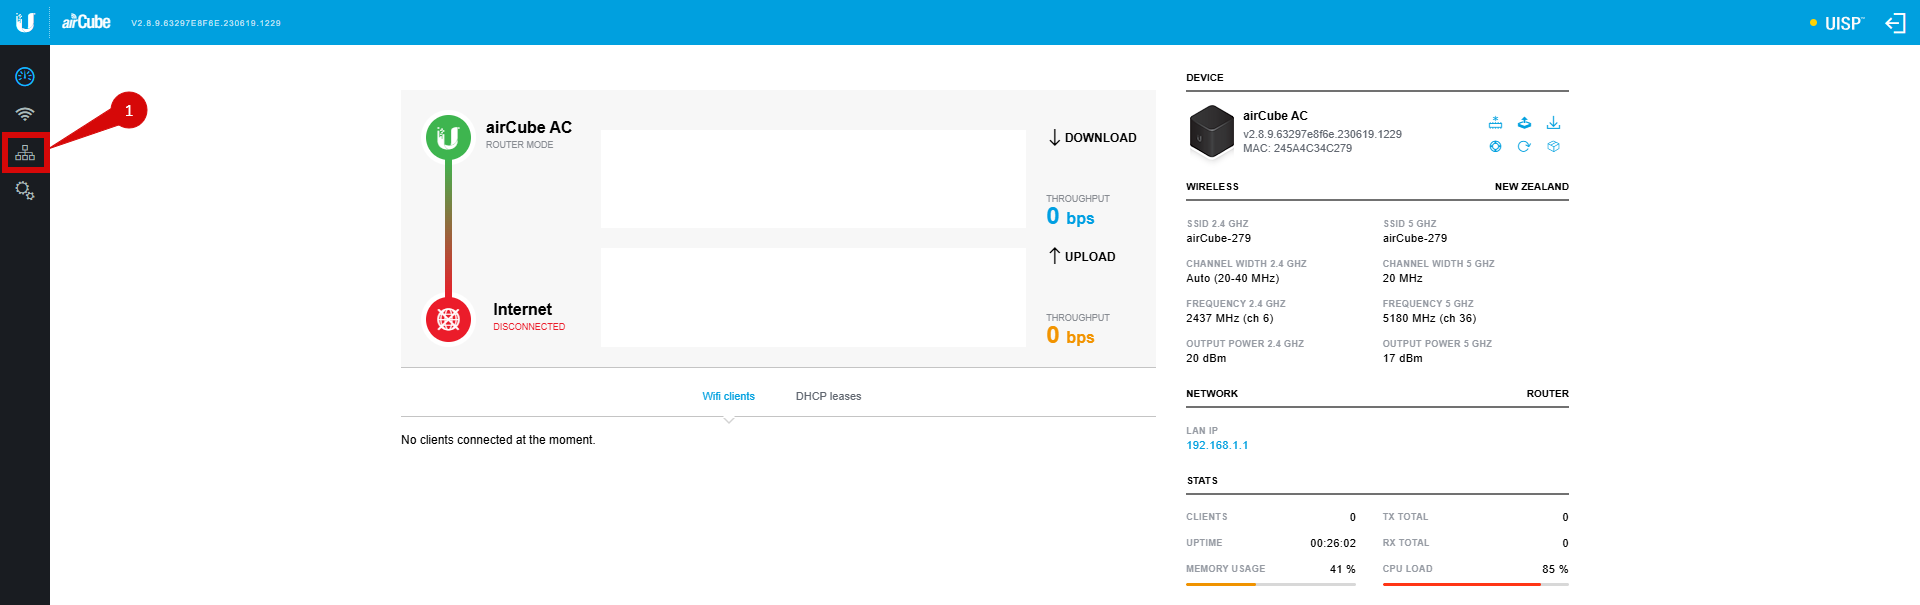
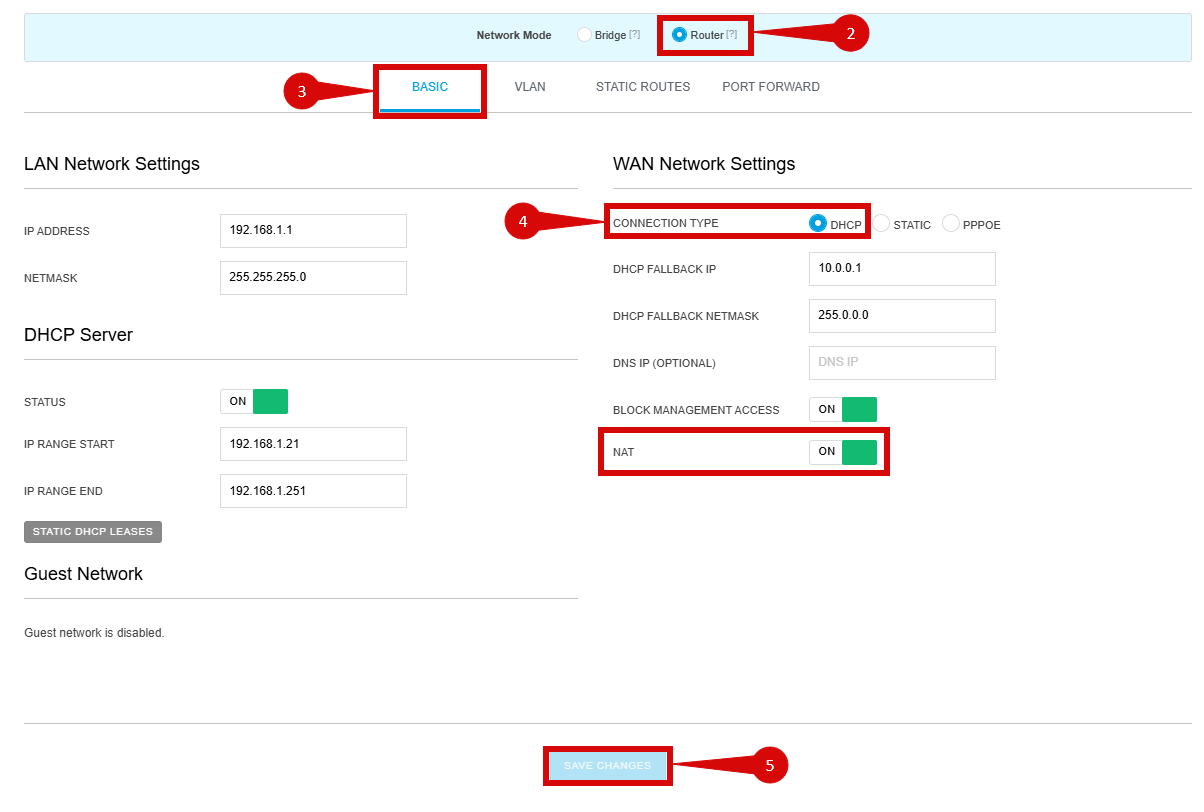
Once physical connection is completed follow instructions below to configure your device:
- Once signed into admin panel click into Network (step 1).
Configure as follows:
- Make sure to set the Network Mode to Router (step 2).
- Click into Basic (step 3).
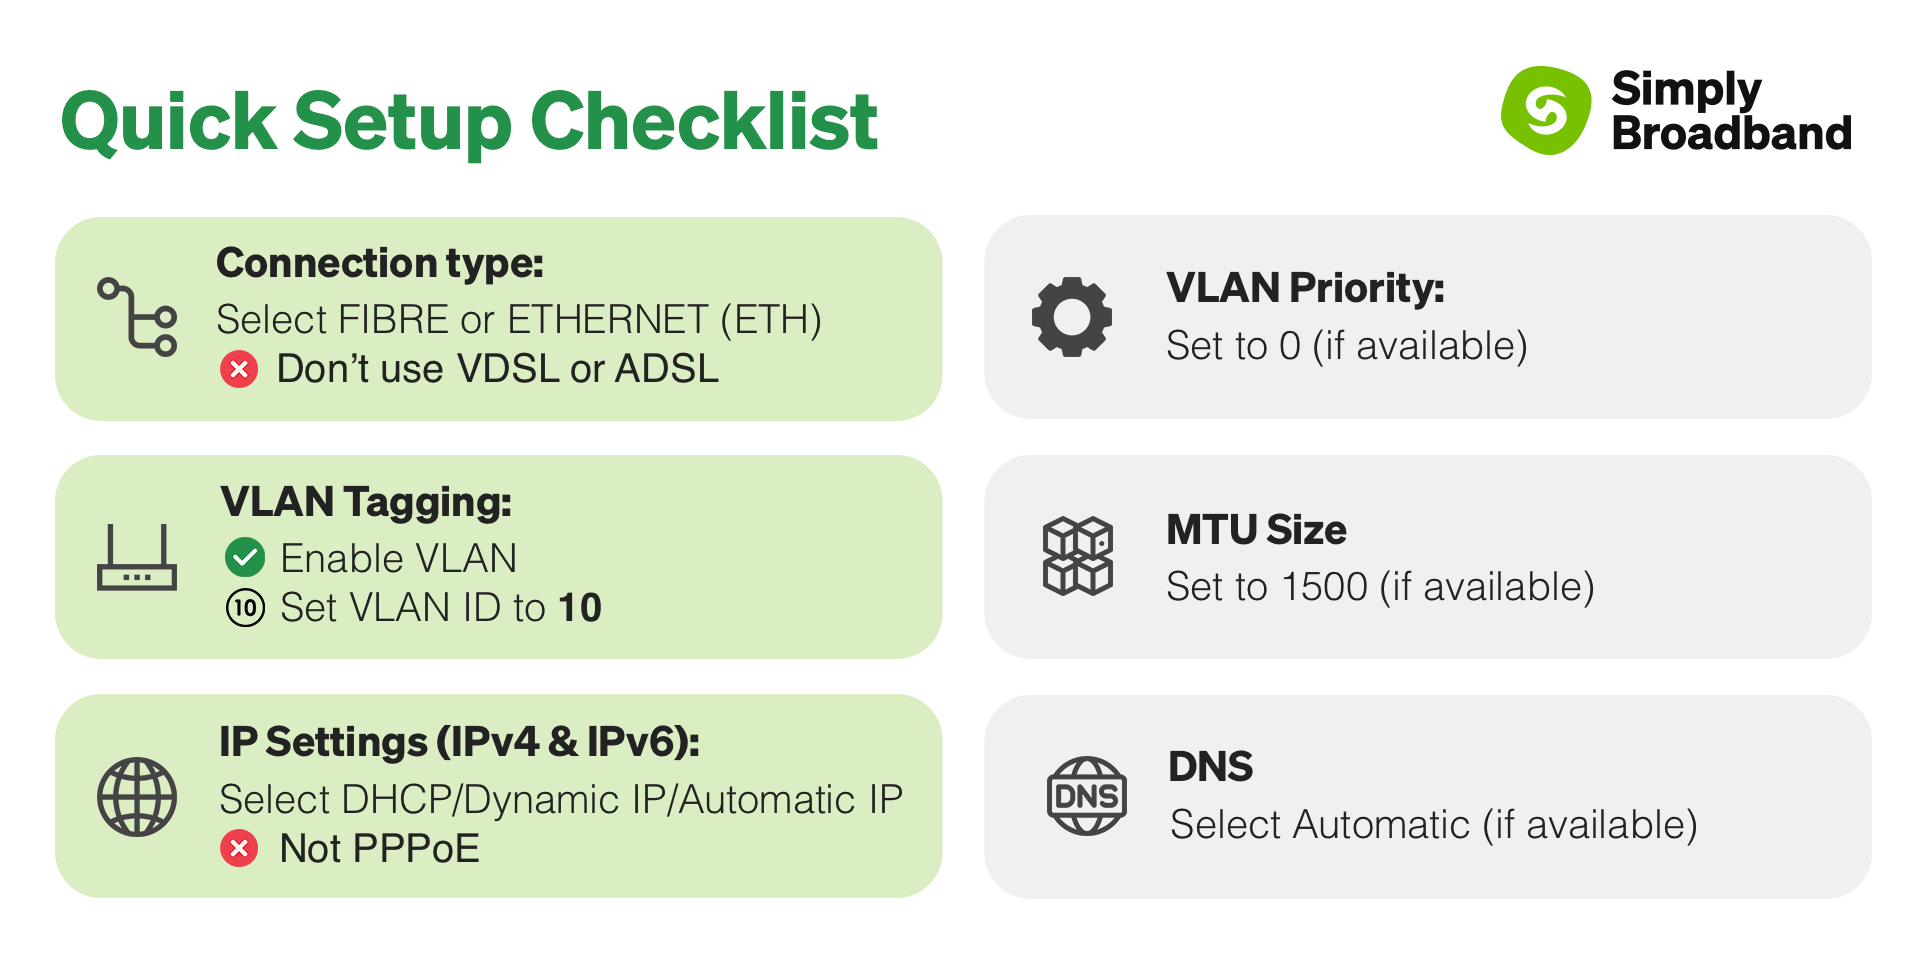
- Set Connection Type to DHCP (step 4).
- Make sure NAT = Enabled.
- Click Save (step 5).
4. Configure VLAN settings
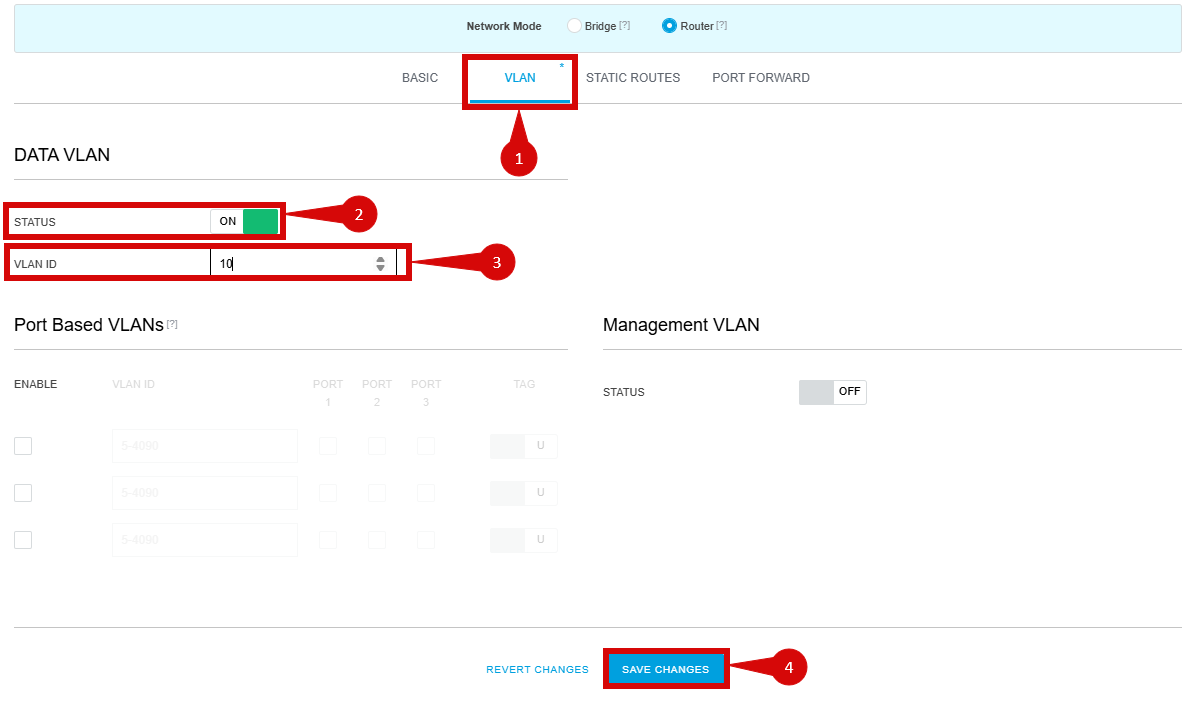
- Navigate to VLAN (step 1).
- Set Status to On (step 2).
- Set VLAN ID = 10 (step 3).
- Click Save
5. Verify the internet connection
- Once the router has restarted, check the status of your internet connection by looking at the WAN/Internet LED indicator on the router. It should be solid green.
- On your connected device, try accessing a website to confirm that your connection is active.
6. Troubleshooting (if needed)
- If your internet connection is not working:
- Restart both the ONT and the router by unplugging them for 30 seconds and plugging them back in.
- Double-check the VLAN and DHCP settings in the router’s configuration.
- Ensure that the ethernet cable is securely connected to the correct ports (first port on the ONT and the WAN port on the router).
7. Reset the router (if required)
- If you cannot access the router due to forgotten login credentials or misconfiguration, reset the router to factory settings:
- Find the reset button at the bottom of the router.
- Press and hold the reset button for about 10-15 seconds using a pin or paperclip.
- Release the button once the router’s lights start flashing. The router will reboot and return to factory settings.
- Log in using your TP-Link ID and repeat the configuration process from step 2.
8. Contact support
- If you are still unable to connect, please reach out to our support team at our Support Portal -https://help.simplybroadband.co.nz for further assistance.