← Back to Nokia Routers Modem / Router UFB Settings
Nokia Routers Nokia HA-140W-B Settings
Official page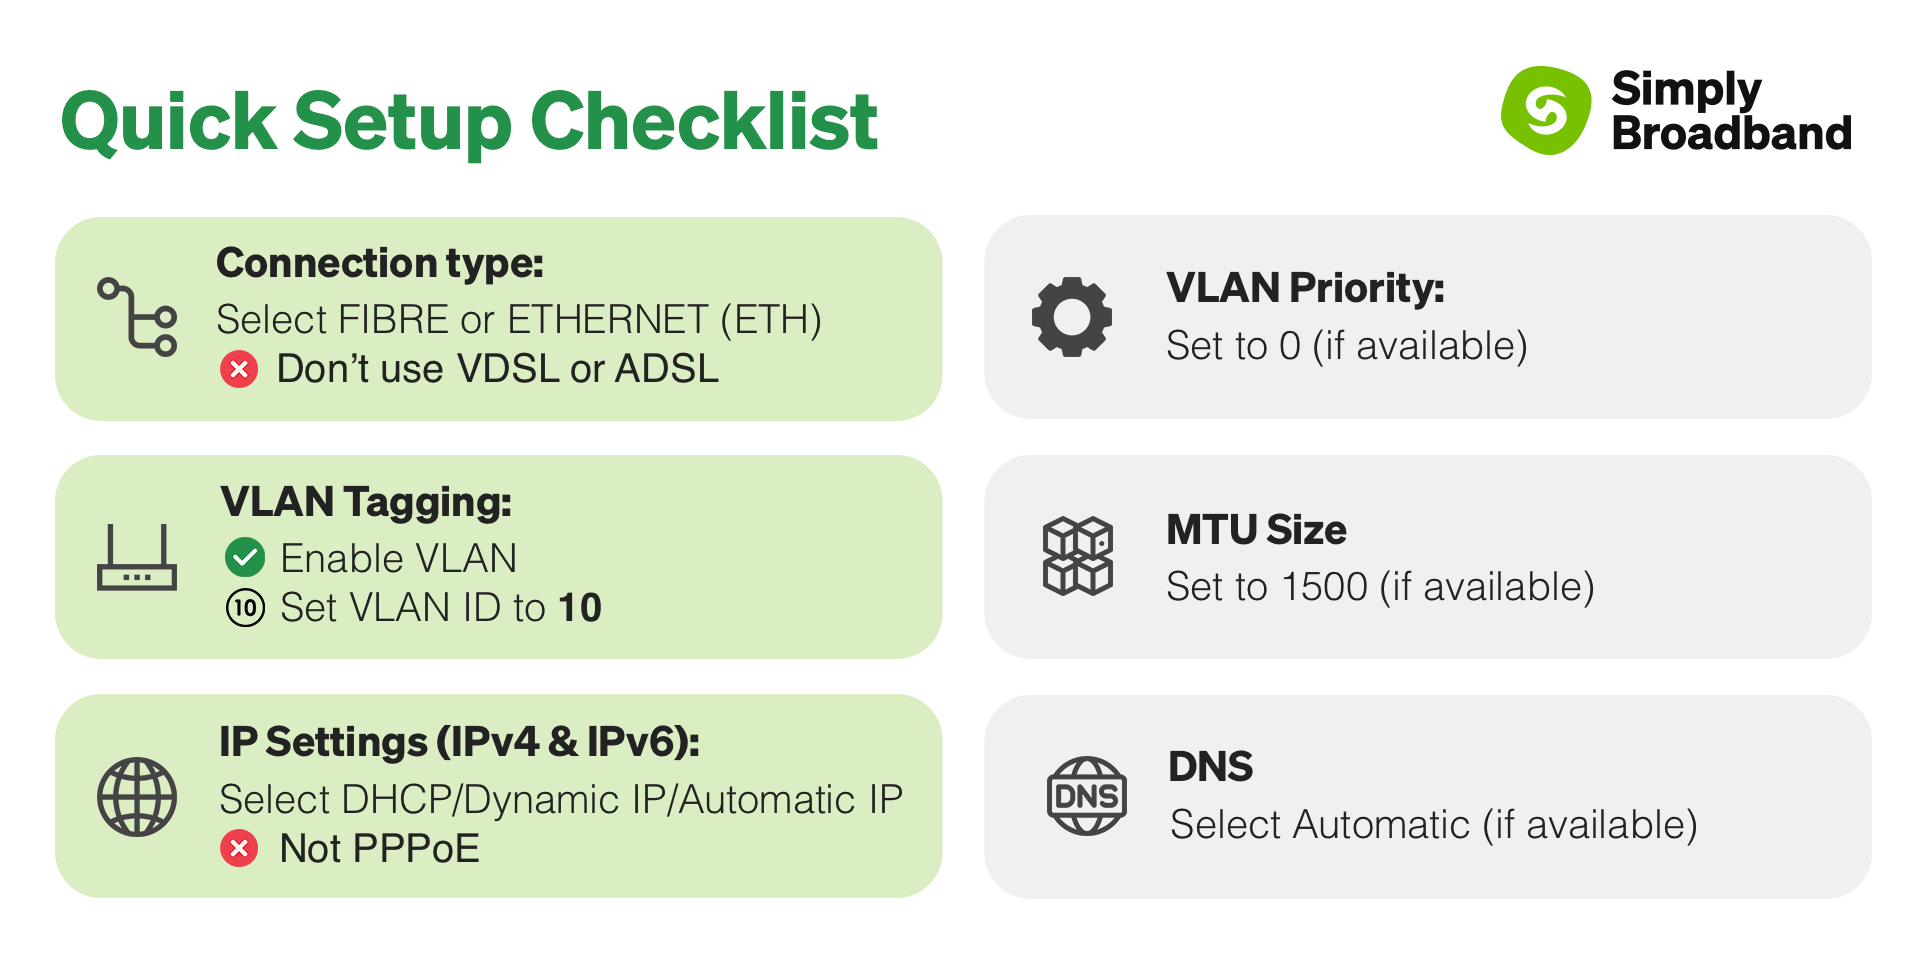
Step-by-step guide to setup Nokia HA-140W-B router
1. Connect your router to the ONT
- Connect an ethernet cable from the WAN port (blue one) on the router to the first port (GE1 or LAN1) on your ONT.
- Ensure the router is powered on and that a device (computer or smartphone) is connected to the router via Wi-Fi or LAN cable.
2. Access the router’s Admin Panel
- Open a web browser on a connected device.
- Enter http://192.168.18.1 in the address bar and press Enter.
- You’ll be prompted to log in. For default login credentials, check the label on the router. If credentials have been changed and are unknown, proceed to Step 7 to reset the router.
3. Configure VLAN, MTU, IPv4/IPv6, and DHCP settings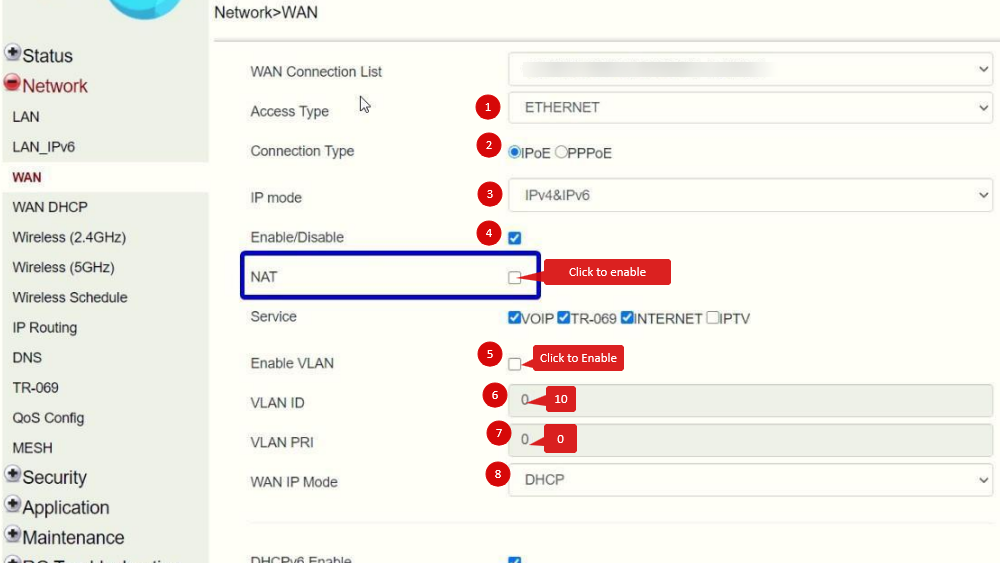
- In the router’s admin panel, navigate to the Network > WAN section.
- You need to select and edit your Fibre connection (it can be called 1_INTERNET_R_VID_ or similar not _ADSL_ or _VDSL_ ones).
- If there is no such connection - click New and create one.
- Connection type: select "ETHERNET"
- Connection type: select "IPoE"
- IP Mode: select IPv4 + IPv6.
- NAT: tick "Enable"
- Service: tick all the boxes
- Tick "Enable VLAN"
- Set VLAN ID - 10
- Set VLAN PRI - 0
- WAN IP Mode: select DHCP (this is equivalent to Dynamic IP)
4. Save the configuration
- Click Apply or Save to confirm the settings.
- The router may restart to finalize the configuration.
5. Verify the internet connection
- Once the router restarts, go to the Status or WAN Status page to confirm a “Connected” status.
- Test the internet connection by opening a website on a connected device.
6. Troubleshooting (if needed)
If the connection isn’t working:
- Restart both the ONT and the router by unplugging them for about 30 seconds.
- Double-check that the VLAN, MTU, IPv4/IPv6, and DHCP settings match the specified values.
- Ensure the ethernet cable is securely connected to both the ONT and the router’s WAN port.
7. Reset the router (if required)
If access is restricted due to forgotten login credentials or misconfiguration:
- Locate the reset button on the back of the router.
- Press and hold the reset button with a pin for about 10-15 seconds until the router’s lights begin flashing.
- After resetting, use the default login credentials and redo the configuration from Step 2.
8. Contact support
If you are still unable to connect, please reach out to our support team at our Support Portal — https://help.simplybroadband.co.nz — for further assistance.